WebEx Meeting Guide for Attendees
If you get a meeting invitation in your email, you can use it to join your meeting in different ways, like from your computer, mobile device, phone, or video system. Your invite includes the options available to you for that particular meeting
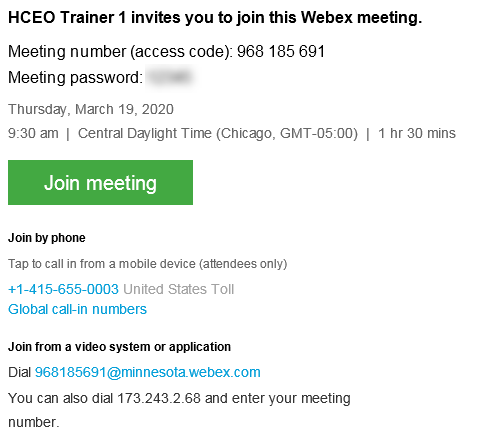
When you receive an email invitation to a Webex meeting, it'll look something like this.
Select Join![]() button.
button.

Call one of the numbers under Join by phone. This is a 'last resort" option and should be used only if you aren't connected to a network for a video. After you join, you can hear everyone talking in the meeting but not their video or content that they're sharing.
When training returns to normal, you will find links to log in to the webinars and handouts on our Health Care Trainers Tool Kit located on the SIR page. https://www.dhssir.cty.dhs.state.mn.us/MMIS/trntl/_layouts/15/start.aspx#/default.aspx
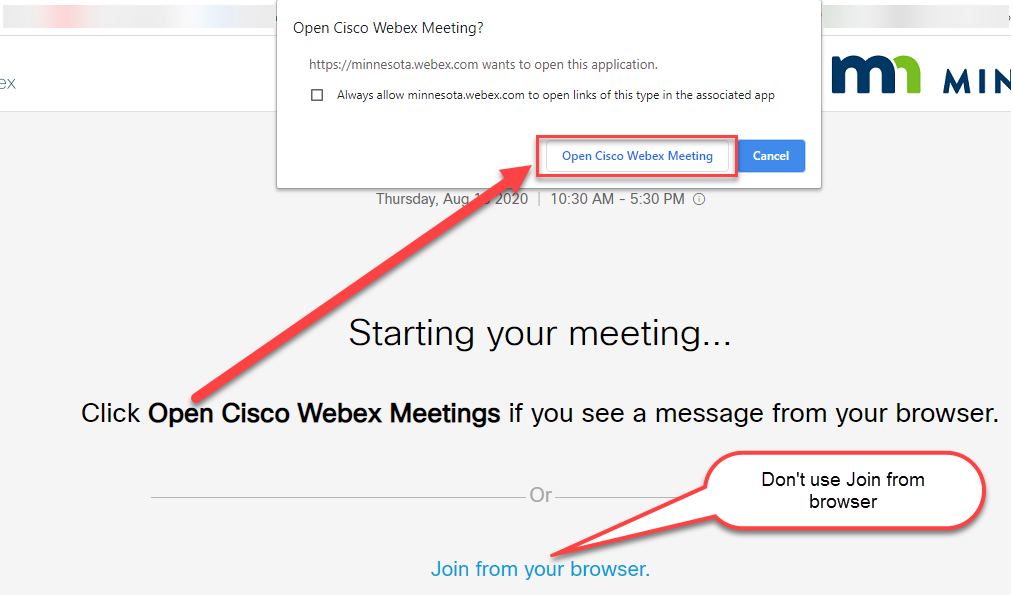
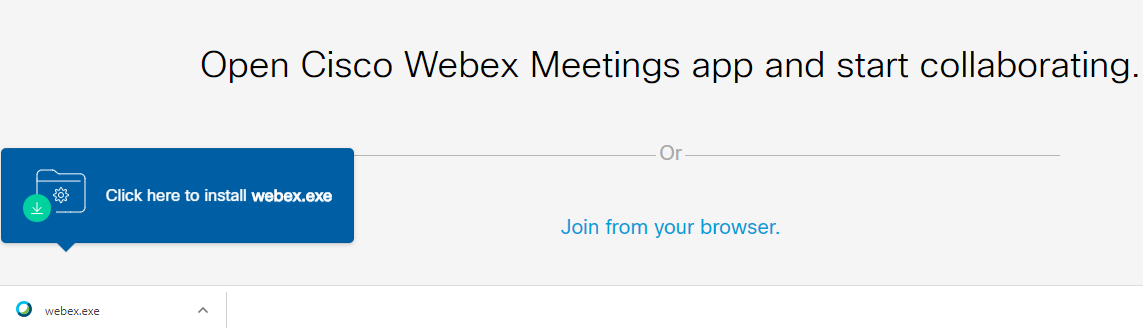
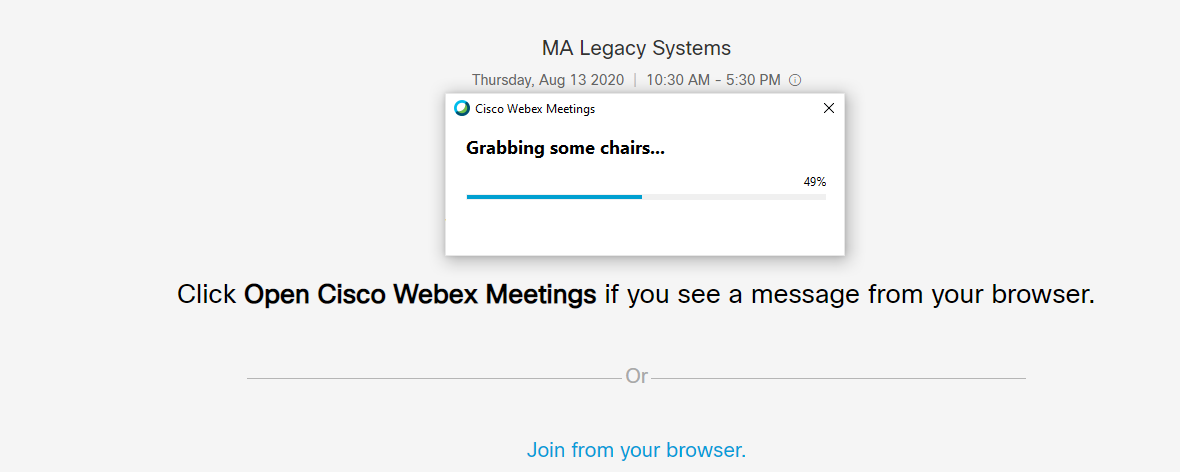
If you have not used WebEx before you will be prompted to install a WebEx launch file. If you have a WebEx account or Desktop App skip these steps.


Step 5: Sign in
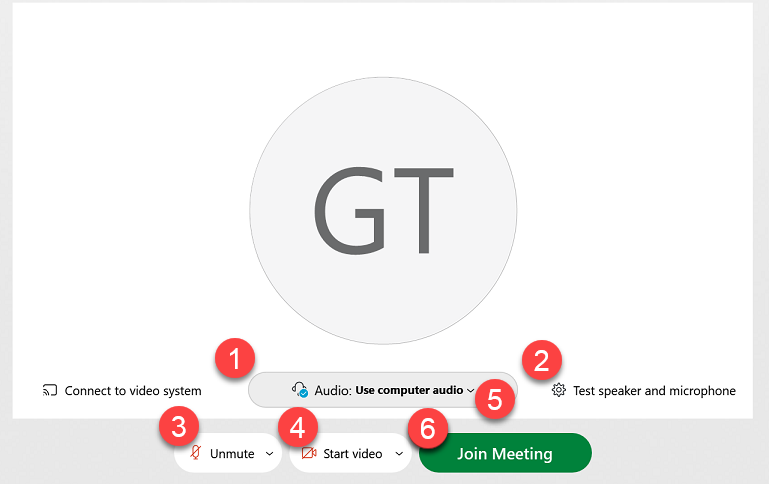
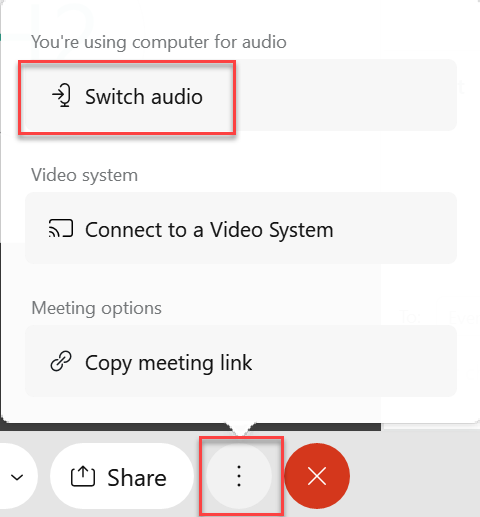
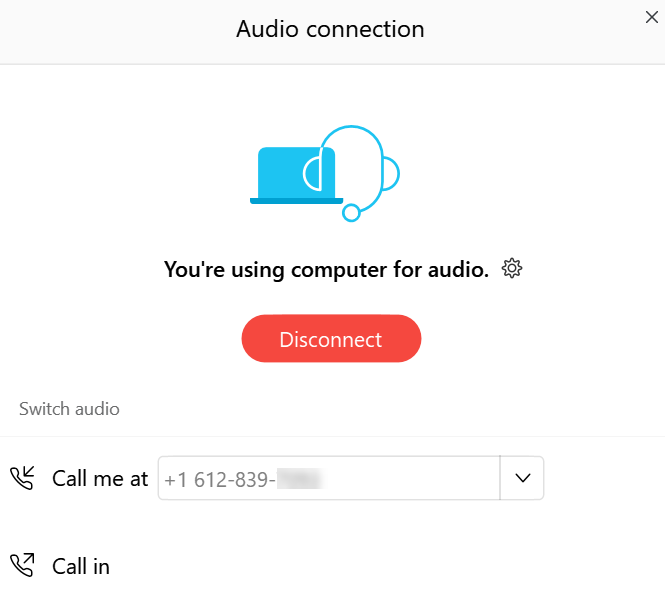
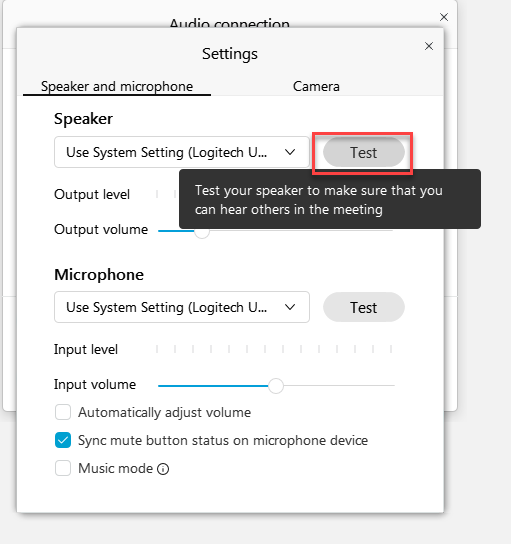
To change from computer audio connection to phone or vice versa, select dropdown as illustrated in Step 5.
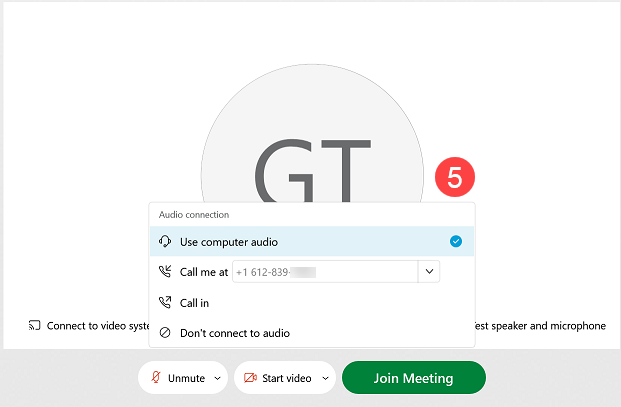
If you choose call me, WebEx will call your number.

You will be asked to "Press 1" to connect to the meeting audio.
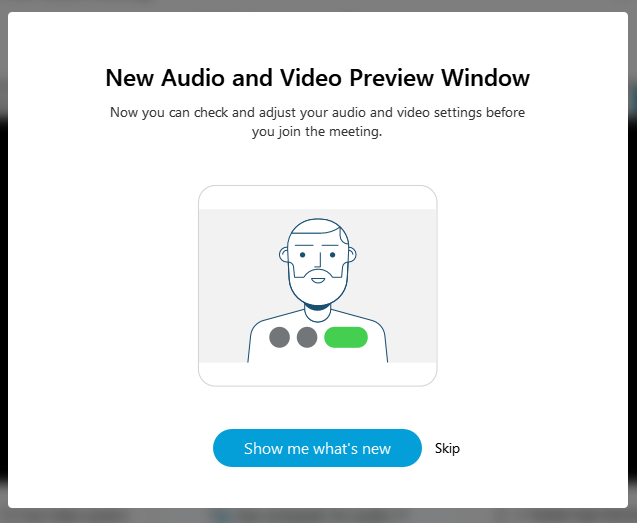
If using WebEx for the first time, instructional tutorial will walk you through some changes in WebEx.
The first page you may see when you log in to Webex. Toolbar on the top left, controls on the bottom, and options to change view on the upper right side. Grid view by default.
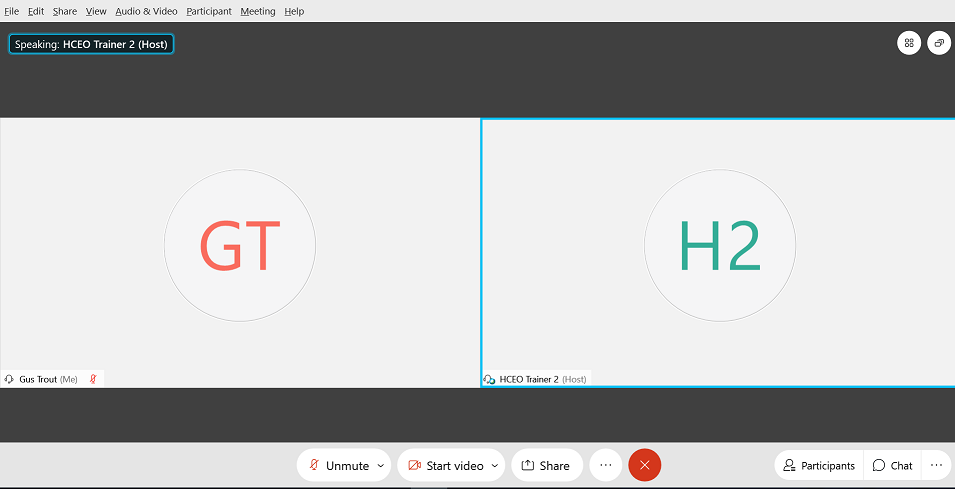
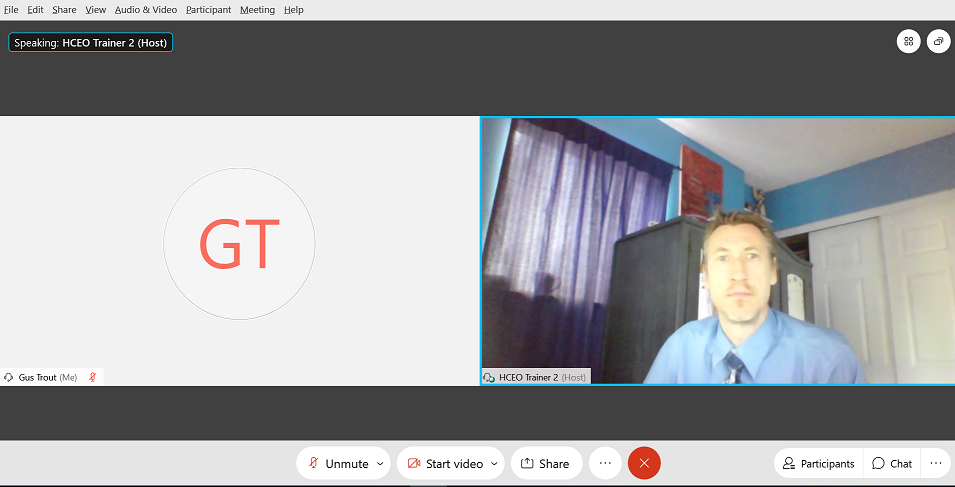
View of a first screen If a host or other attendees have a video on.
View of a first screen if host is sharing the screen.

![]() Switch from Grid view to Active Speaker Video view
Switch from Grid view to Active Speaker Video view
Select Unmute control to talk after you have already joined the meeting
Select Start video control to add your video after you have already joined the meeting

From computer to phone and vice versa. Select More options control.
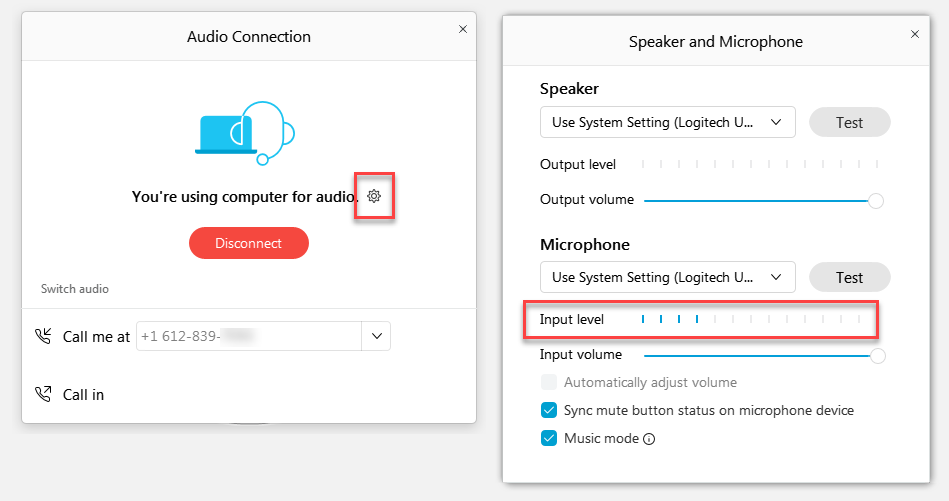
Test your computer audio. Moving progress bars will show the strenght of your incoming and outgoing audio.
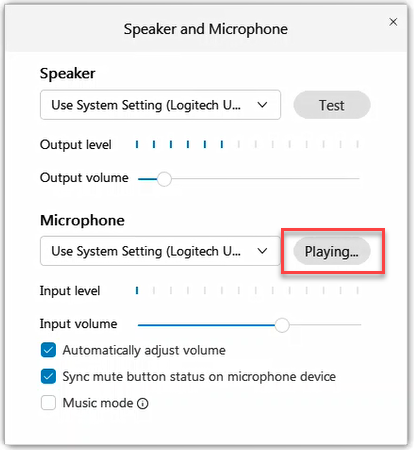
On the bottom of the WebEx window you will find different controls
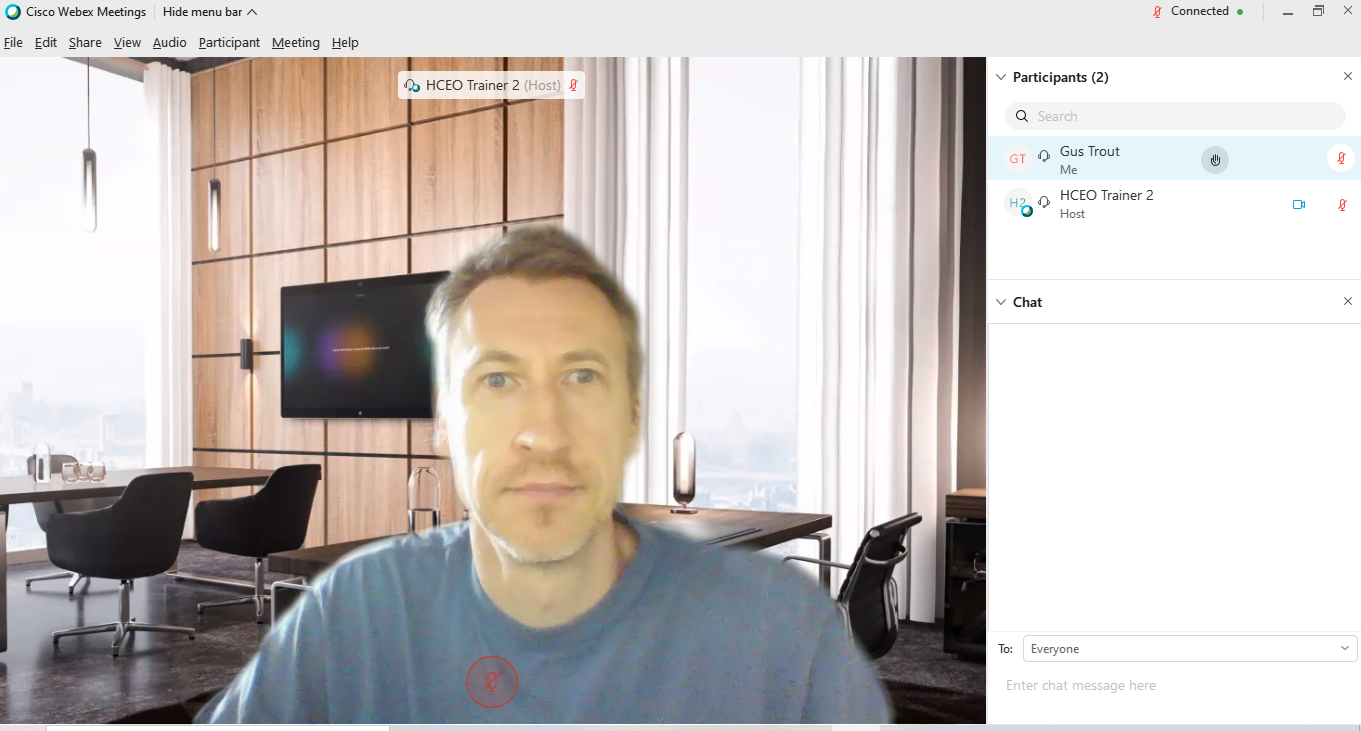
Panels will display on the right side of the screen.
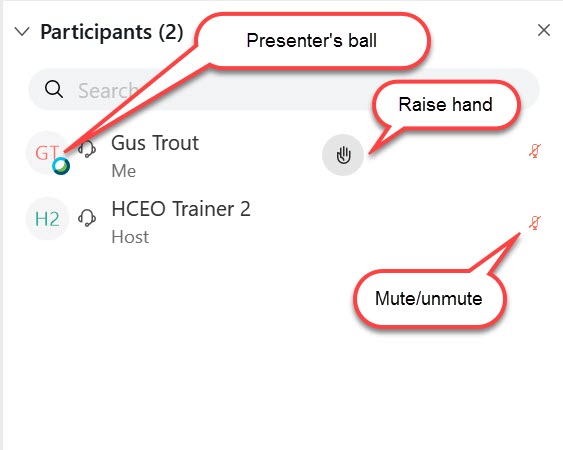
Participant Panel. Shows list of participants, identifies the Host and a Presenter. It contains the "Raise hand" feature to let the presenter know that you have a question. Mute/Unmute control is also in the Participants Panel.
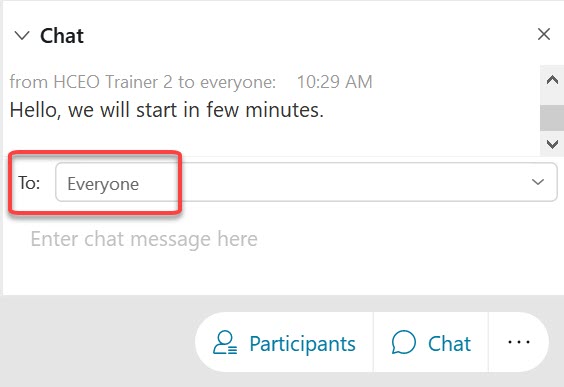
Chat Panel. You can choose to send a message via chat to Everyone or privately to any of the participants.
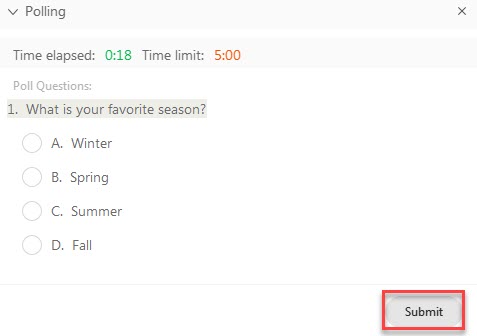
Depending on the Meeting, additional Panels may be available. For example, Polling and Q and A. When trainers will open a polling question, you will see an additional panel displayed on the left-hand side. Respond to the poll question by selecting an answer and select Submit. Trainers may or may not reveal the results/distribution of the poll question.
If you don't see the contents of the panels, they might be collapsed. Click on the trigger on the right of the name of the panel to expand and view its contents. Similarly, if you wish to close any of the panels, you can click on the trigger to collapse any of the panels. To remove the panel select X.


![]()
If Chat panel is collapsed notification will be displayed indicating that there is a new chat message.

View trainer screen without Prticipant and Chat panels open
Controls remain on the bottom of the screen.
View trainer screen with Prticipant and Chat panels open

To zoom in and out you can also use a standard keyboard shortcuts CTRL + and CTRL -

You can share your content during a Webex meeting. In the Participants panel, grab the ball ![]() and drop it next to your name or ask Host to pass you the ball. You can also go directly to Share control on the bottom of the WebEx window.
and drop it next to your name or ask Host to pass you the ball. You can also go directly to Share control on the bottom of the WebEx window.
You became the presenter. Select Share control and start sharing.
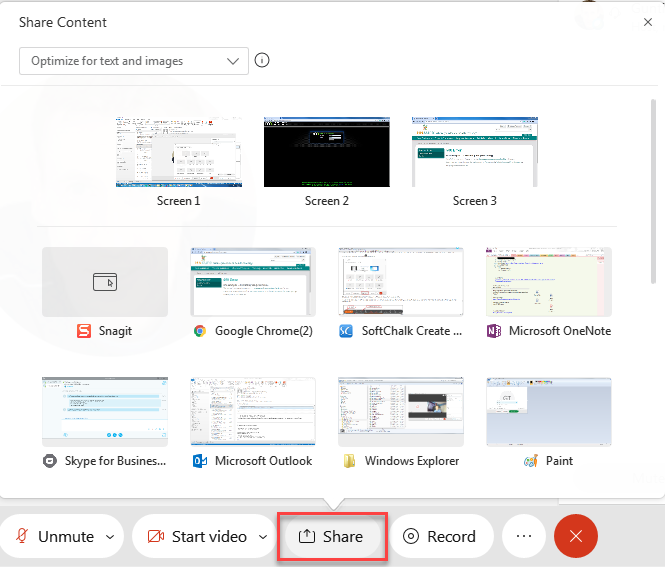
Select what you want to share from the active windows, other applications, Whiteboard, or share a file saved on your computer.
Once Shared content is displayed, you will have a floating navigation toolbar on the top of your screen containing controls and additional presenter tools. Hover your mouse over to reveal the toolbar. Depending on the meeting set up, the navigation toolbar may look different.

Occasionally, when you are sharing your content, trainers may need to "request control" of your computer, to help you with a certain task. To enable the trainer to do so, select Assign, then hover to Pass Keyboard and Mouse Control and select the trainer.

If you are a Presenter and would like to annotate content you are sharing, after selecting the Annotate option on the toolbar, a menu with annotation tools will open on the left-hand side of the screen.

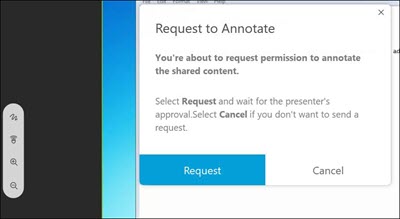
If you are not a Presenter but are viewing someone's shared content, you will have a small annotation toolbar on the left-hand side of the window.
Most likely you will need to request permission to annotate on the content shared by a Presenter and the Presenter will need to approve your request.
To insure that you have a great and seemless WebEx experience, there are few things you can do prior to the meeting.
Supported Operating Systems:
|
Operating System |
Version |
|---|---|
|
Windows |
7, 8, 9, 10 |
|
Mac OS X |
10.13, 10,14, 10.15 |
Firefox 52 and later is fully supported in Mac OS X. Firefox 51 and earlier versions are not supported. Users receive a message stating this when they attempt to join or start a meeting with these browser versions.
How do I know which browser I am using? Whatsmybrowser.org displays your browser and browser's version, lets you know your screen size and whether you have Flash installed. Whatsmybrowser website.
You can find out more about WebEx Meeting System Requirements here.
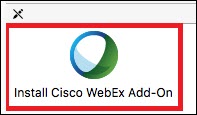
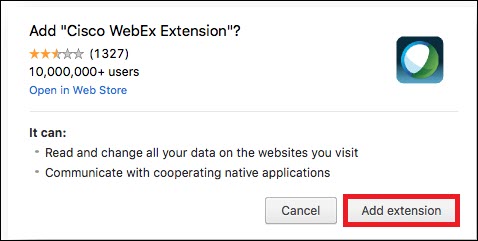
If you don't have a WebEx license or using a WebEx for the first time, you may need to install WebEx Add
1. If you are prompted, install the Chrome extension by clicking "Add WebEx to Chrome"
2. Select "Add extension"

3. If the WebEx Meeting Center applications are not already installed, an installer will be downloaded automatically, and must be run manually. Open the installer by clicking it in the bottom left corner.
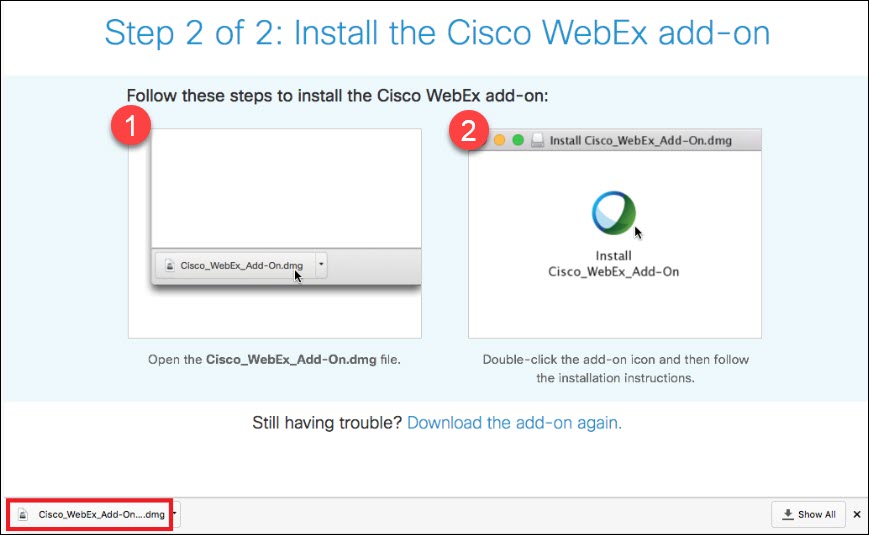
4. A window will open showing the installer application. Double-click on "Install Cisco WebEx Add-On".